• Home
  • About
  • Contact
    • Category
    • Category
    • Category
  • Shop
  • Advertise
Facebook Instagram Pinterest

Yummylicious Experiments

It's my passion and I love it. Enough said.

I've always been wanting to lay my hands on this book. Okashi Treats: Sweet Treates Made with Love by Keiko Ishida.

I finally got it and love reading the book! It includes recipe for basic recipes, complete with illustrations for some of the steps. And every recipe comes with tips to note. Love it to bits! 

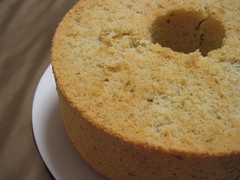
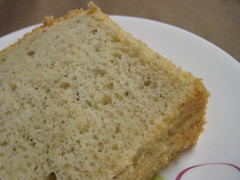
So this weekend, I tried my hands on Black Sesame Chiffon Cake. The recipe is slightly lighter in flavor compared to the usual chiffon cakes I made before. I was a little worried that it wouldn't turn out well, but it is super yummy! Reviews were very good!

I'm already getting ready for the next recipe that I want to try!


Black Sesame Chiffon Cake

Black Sesame Chiffon Cake

Share
Tweet
Pin
Share
No comments
More experiments on Chai  Tea. This time its Chai Tea Chiffon Cake with Chai Whipped Cream.

I adapted the Chai Cream recipe from this site. But instead of preparing all the spices, I infused the cream with the tea leaves from T2. The steps are exactly the same, and the cream is prepared one day before so that it's cold enough to be whipped.

Chai Tea Chiffon Cake

Ingredients
(A)
225g all-purpose flour
1 tsp baking powder
1 tsp salt
65g sugar

(B)
1/2 cup vegetable oil
6 egg yolks
3/4 cup water
1 tbsp Chai Tea leaves

(C)
6 egg whites
1/2 tsp cream of tartar
95g sugar

  1. Preheat over to 175 degree celsius.
  2. Combine (A) in a bowl. Stir well to blend.
  3. Combine (B) and stir till well blended.
  4. Make a well in (A), add (B) to the flour mixture. Beat with mixer until smooth.
  5. Beat egg whites till foamy. Add in 1/3 of the sugar and cream of tartar, beat for a few minutes.
  6. Add in remaining 2/3 sugar and cream of tartar, continue beating with stiff and glossy peak.
  7. Gently fold in 1/3 of egg white mixture to egg yolk mixture.
  8. The mix and fold in the egg yolk mixture to the rest of the egg white mixture till well combine.
  9. Pour mixture into cupcake liners.
  10. Bake for 10 - 15 min.
  11. Whip Chai Tea cream till peak. Decorate cupcake with cream once the cake is cool.

Chai Tea Chiffon Cupcake


Share
Tweet
Pin
Share
No comments
A slightly more presentable chiffon cake this week! I just realized that I had my oven on grill when I baked my Earl Grey tea last week. No wonder the top was burnt lo!

Now that all the settings were right, I had a more spongey chiffon cake with a tinch of Lavender taste! Thanks to Aeriel for sharing her Lavender flowers with me!

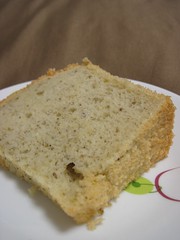
Lavender Chiffon Cake Lavender Chiffon Cake

Lavender Chiffon Cake Lavender Chiffon Cake

Lavendar Chiffon Cake
Ingredients
(A)
225g all-purpose flour, sifted
1 tbsp baking powder
1 tsp salt
65g sugar

(B)
1/2 cup vegetable or canola oil
6 egg yolks
3/4 cup water
1 tbsp Lavender flower - blended coarsely

(C)
6 egg whites
1/2 tsp cream of tartar
95g sugar
  1. Preheat oven to 175 degree celsius.
  2. Combine (A) in a bowl. Stir well to blend.
  3. Add (B). Beat with an electric mixer until smooth.
  4. Beat (C) until moist peaks formed. Gradually add 3/4 cup sugar, beating until stiff and shiny peaks are formed.
  5. Fold 1/3 of the egg whites into the egg yolks mixture, fold to mix and then add the rest of the egg whites. Fold gently but thoroughly.
  6. Pour batter into ungreased 10" tube pan.
  7. Bake for 60 mins or till a toothpick inserted in the center comes out clean.
  8. Invert cake and cool completely in pan. When cool, loosen the edges and shake pan to remove cake.
Share
Tweet
Pin
Share
No comments
Earl Grey Chiffon Cake Earl Grey Chiffon Cake

Earl Grey Chiffon Cake
Ingredients

(A)
225g all-purpose flour, sifted
1 tbsp baking powder
1 tsp salt
65g sugar

(B)
1/2 cup vegetable or canola oil
6 egg yolks
3/4 cup water
1 tbsp Earl Grey Tea leaves

(C)
6 egg whites
1/2 tsp cream of tartar
95g sugar

  1. Preheat oven to 175 degree celsius.
  2. Combine (A) in a bowl. Stir well to blend.
  3. Add (B). Beat with an electric mixer until smooth.
  4. Beat (C) until moist peaks formed. Gradually add 3/4 cup sugar, beating until stiff and shiny peaks are formed.
  5. Fold 1/3 of the egg whites into the egg yolks mixture, fold to mix and then add the rest of the egg whites. Fold gently but thoroughly.
  6. Pour batter into ungreased 10" tube pan.
  7. Bake for 60 mins or til a toothpick inserted in the center comes out clean.
  8. Invert cake and cool completely in pan. When cool, loosen the edges and shake pan to remove cake.
Share
Tweet
Pin
Share
No comments
Yet another Chiffon Cake this weekend. That's because I kept all my other tins in carton, ready to move over to my parents new place. I'm now looking for another Chiffon Cake recipe. =P

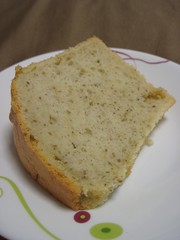
Got this recipe Kitchen Caper, posted by Reirei. I forgot to take pictures of the cake until almost everything was gone, so I only have photos of a slice of it. Hehehe...

Lemon Yogurt Cranberries Chiffon Cake

Lemon Yogurt Cranberries Chiffon Cake

Lemon Yogurt Cranberries Chiffon Cake


Lemon Yoghurt Cranberries Chiffon Cake

Ingredients A
4 egg yolks
40g castor sugar
1/4 tsp salt
40g corn oil
120g plain yoghurt
2 tbsp lemon juice
80g dried cranberries (I used Craisins, Ocean Spray)
zest of 1 lemon

Ingredients B
120g Cake flour
1/2 tbsp Baking powder

*Sift 2x

Ingredients C
5 egg whites
50g castor sugar
1/2 tsp Cream of Tartar

  1. In a bowl, using hand whisk, whisk yolks and sugar till sugar dissolves.
  2. Add oil and salt, whisk and add yoghurt, lemon zest and lemon juice. Stir well.
  3. Fold in sifted flour, cranberries and mix well.
  4. In another bowl, using an electric mixer, beat till the whites are frothy. Add in Cream of Tartar and beat till soft peaks.
  5. Add in sugar gradually and beat till stiff peaks.
  6. Fold in 1/3 of the whites into the yolk mixture using a rubber spatula till incorporated.
  7. Pour the mixture to the remaining egg whites and fold in gently till incorporated.
  8. Pour the batter into a 21cm chiffon tube pan. Bang the pan on the table to get rid of bubbles.
  9. Oil a piece of aluminium foil and cover the pan loosely. Bake at 170 deg.C for 10mins.
  10. Turn down the temperature to 160 deg.C and bake for 10mins. Lift up the foil to check the surface of cake, bake for another 10mins.
  11. Insert a skewer to check if cake is done. Remove the foil and reduce the temperature to 150 deg.C and bake for a further 5 to 10mins to brown the surface.
  12. Remove from the oven and invert the pan. Remove the cake from pan when it's completely cooled.
Lazy me skipped steps 9 - 11. The foil was supposed to help brown the cake evenly. My cake also flopped a little 'cause I under whisked the egg whites. So it didn't turned out that 'tall', but it still tasted soft and moist!
Share
Tweet
Pin
Share
No comments
The Blueberry Chiffon Cake was tasty, but the colour was hideous, so it's not suitable to load the picture online. That will probably scare people away! LOL

Anyway, I got hooked on my Kenwood, so I baked another Chiffon Cake today! Orange Chiffon Cake! Got the recipe from Aunty Yochana. The cake tastes YUMMY and refreshing with the orange flavour! The texture was light and fluffy, and it was not dry.

The recipe calls for Orange Emulco, but since I don't use it all the time, the emulco will probably expire the second time I think about using it again. So instead, I used orange rind, which is more convenient and natural, it also exudes the strong orange flavor the cake needs.

Orange Chiffon Cake

Orange Chiffon Cake
Share
Tweet
Pin
Share
1 comments
Older Posts

About me

About MeBaking is something I've been learning since my secondary schools, and now I still love learning new techniques and experimenting recipes. The greatest satisfaction is when everyone enjoys my bakes and wipes them all out!

Follow Us

  • Facebook
  • Instagram
  • Pinterest

Labels

  • aglio olio
  • almond flakes
  • baileys
  • baked
  • bakes
  • baking
  • banana
  • bangkit
  • birthday cake
  • biscuits
  • black forest
  • black sesame
  • blueberry
  • bread
  • browneyedbaker
  • brownie
  • bun
  • butter
  • butter cake
  • buttercream
  • buttermilk
  • cake
  • cake recipe
  • cakes
  • canned fish
  • caramel
  • caramel buttercream
  • caramelized onions
  • carrot
  • chai tea
  • cheese
  • cheesecakes
  • cherries
  • cherry
  • Chicken
  • chiffon
  • chinese
  • chinese new year
  • chip
  • chocolate
  • chocolate chips
  • chunky mushroom
  • cny
  • coffee
  • coffee cream
  • cookies
  • cranberries
  • cranberry
  • cream
  • cream cheese
  • cream of mushroom
  • cupcake
  • cupcakes
  • dark cherry
  • dough
  • durian
  • durian cake
  • durian puree
  • earl grey
  • egg whites
  • fish
  • flakes
  • flower
  • fresh cream
  • hazelnut
  • honey
  • irish baileys
  • jam
  • kueh
  • kueh bangkit
  • kuih
  • lapis
  • lavendar
  • layered cake
  • lemon
  • lemon meringue
  • liquor
  • lychee
  • mango
  • marble
  • marble cake
  • marmalade
  • mascarphone
  • meringue
  • mint
  • mocha
  • mojito
  • mousse
  • mousse cake
  • muffin
  • muffins
  • mushroom
  • natural yogurt
  • non-dairy cream
  • nutella
  • old school
  • onion bread
  • orange
  • orange juice
  • orange rind
  • pandan
  • pasta
  • pastries
  • pies
  • pineapple
  • pineapple tarts
  • pistachio
  • pitted cherry
  • prawn
  • raisins
  • recipe
  • rolls
  • rum
  • sago flour
  • salted caramel
  • salted egg yolk
  • sardine
  • shortcake
  • soup
  • sponge cake
  • strawberry
  • struesel
  • sweet bread
  • sweet bun
  • sweet dough
  • swiss roll
  • tarts
  • tea cake
  • tiramisu
  • traditional
  • tuna
  • vanilla
  • walnuts
  • walnuts. carrot cake
  • whipped cream
  • yogurt
  • zblog

recent posts

Sponsor

Facebook

Blog Archive

  • ▼  2017 (3)
    • ▼  January (3)
      • Salted Egg Yolk Cookies
      • Pineapple Tarts (Enclosed)
      • Kueh Bangkit
  • ►  2014 (3)
    • ►  October (2)
    • ►  July (1)
  • ►  2013 (9)
    • ►  October (5)
    • ►  September (1)
    • ►  August (3)
  • ►  2010 (10)
    • ►  October (1)
    • ►  May (2)
    • ►  March (2)
    • ►  February (1)
    • ►  January (4)
  • ►  2009 (14)
    • ►  July (2)
    • ►  June (1)
    • ►  April (2)
    • ►  March (7)
    • ►  February (1)
    • ►  January (1)
  • ►  2008 (7)
    • ►  November (2)
    • ►  October (1)
    • ►  August (2)
    • ►  July (1)
    • ►  January (1)
  • ►  2007 (14)
    • ►  October (4)
    • ►  August (5)
    • ►  July (3)
    • ►  June (1)
    • ►  April (1)
Facebook Instagram Pinterest
FOLLOW ME @INSTAGRAM

Created with by ThemeXpose | Distributed By Gooyaabi Templates