• Home
  • About
  • Contact
    • Category
    • Category
    • Category
  • Shop
  • Advertise
Facebook Instagram Pinterest

Yummylicious Experiments

It's my passion and I love it. Enough said.


And here's my 3rd CNY goodies for 2017! Always a favorite recipe and goodie every year, but I'm trying out a new recipe this year. As usual, I always go for simple recipes but still as yummy!


This 4-ingredient recipe from Baking Tai Tai is a winner!


Salted Egg Yolk Cookies


Ingredients
100g salted butter (I notice Golden Churn butter gives it a better flavor)
50 caster sugar
4 cooked salted egg yolks
200g cake flour

1 egg yolk
white sesame seeds
  1. Steam salted egg yolk for 10 mins and mash till as fine as possible.
  2. Sift flour. Set aside.
  3. Cream softened butter and caster sugar till a small peak is formed.
  4. Add in mashed salted egg yolk and mix till combined.
  5. Mix in sifted flour till a soft and pliable dough is formed.
  6. Divide dough into 10g each, roll into a ball and place on baking tray.
  7. Apply egg wash and sprinkle white sesame seeds on the surface of the ball.
  8. Bake in preheated oven at 170C for 10 min and then lower temperature to 150C to bake for another 15 min or until surface is golden brown.
    (This temperature and time is suggested in the original recipe. I baked mine at 160C for 25 min or until golden brown and it comes out well too.)


Share
Tweet
Pin
Share
No comments
I love eating pineapple tarts, finding ones that are nice can be difficult. One that is crumbly, buttery enough yet isn't too sweet. Sourcing for commercial ones are difficult, researching for recipes that gives you the most satisfying results are even more difficult.

One of the groups I joined, shared this recipe from Nasi Lemak Lover. And oh boy! The ingredients are so simple! Only 4 ingredients needed. It's so easy to bake and it comes out very tasty! For the butter, I've tried using Golden Churn chilled butter as well as some other brand. I find that Golden Churn butter is more fragrant and gives it a more buttery taste!

In the past, I've always made the open version. This is my first time baking an enclosed version, somehow, I think this is quicker and less time-consuming than the open version.

But I have to confess! I don't make my own pineapple jam! I always get them from Phoon Huat, which is delicious with the right amount of sweetness and sourness.

When I bring them to the office, they are always snapped up within half the day! So gratifying!


Pineapple Tarts (Enclosed version)


Ingredients
350g butter (Golden Churn chilled butter)
100g condensed milk (I used Milkmaid)
510g flour (I use Top Flour from Prima)
2 egg yolks


1 egg yolk + 1 egg (for egg wash)


700g pineapple filling (I used Premium Grade from Phoon Huat)


  1. Cream butter and condensed milk till light.
  2. Add in egg yolk one at a time, and beat until combined.
  3. Mix in flour, mix till become a soft and non-sticky dough.
  4. Roll pineapple filling into ball (8g each) and roll dough into ball (10g each).
  5. Flatten a piece of dough and place a piece of the rolled pineapple filling in the middle. Bring the edges of the dough together and press lightly to seal. Roll it in between your palms to shape it into a ball.
  6. Apply egg wash with a brush.
  7. Bake in preheated oven at 165C for 23 mins or until golden brown.
  8. Cool completely before storing.


Share
Tweet
Pin
Share
No comments
Because this CNY goodie is Mr Loh's favorite, I attempted to make this many years ago but failed terribly. Thanks to the Facebook group I joined, someone tried out this recipe and commented that it was really good and has that 'melt-in-your-mouth' texture, which is an important aspect to the success of this cookie.
 
So thanks to fatboo numerous experiments on his recipe, I successfully produced an extremely fragrant and melt-in-your-mouth kueh bangkit that MIL also approved (she hardly approves anything)!
 
Even though everyone thinks its difficult to make, I think it's actually fair simple to make, just that its a little time-consuming - you need to fry the flour, wait for it to cool down etc. And handling the dough was a little tough because it's wet, but the end results was very satisfying! This is definitely a recipe to keep and bake again for the next CNY!


Kueh Bangkit
 
(This recipe says it yield 200 - 300 bangkit, but because I cut out a thicker bangkit, I only managed to yield about 200 bangkit)
 
Ingredients

800g Sago flour
12 Pandan leaves
240g Coconut cream (Ayam Brand Pure/Premium Coconut Cream)
200g Icing sugar
3 Egg yolks
 
In this recipe, you need to fry more of the Sago Flour because some will be used for flouring the pastry board & bangkit cutter. Prepare at least one day in advance as the flour needs to cool down completely before you can use them

On initial frying, the flour will be lumpy & hard to stir. After 10 mins of frying it becomes a little lighter. Towards last part of frying, the flour will become dry & flies up when stirred, which indicates that it is ready
 
  1. Wash Pandan Leaves and wipe with paper towels till very dry, then cut into 2” lengths
  2. 800g Sago flour: In a big wok, dry fry over low heat for 10mins, stirring all the time with a slotted spatula
  3. Add cut pandan leaves & continue to fry for about 10mins till flour is light & the leaves are dried & crinkled
  4. Spread the Fried Sago Flour in wok & leave to cool completely (preferably overnight)
  5. Sift it & then store
  6. Hand whisk coconut cream and 100g of icing sugar till sugar is dissolved and mixture is semi-greyish thick sugary solution.
  7. Whish egg yolks and remaining icing sugar till creamy white and sugar dissolved.
  8. Lower speed and add in coconut sugar solution, whisk till well mixed.
  9. Add in 560g sago flour and mixed till well combined. (Pastry will be very sticky and quite hard to handle but it's ok).
  10. Cover with a piece of wet cloth to prevent pastry from drying out and then leave the dough aside.

  11. Set aside remaining sago flour to dust the work top and to flour the kueh bangkit cutter. Line pastry board with a piece of cling wrap.
  12. Use a cake scraper to cut out a small portion of the Sticky Pastry, sprinkle a little Fried Sago Flour over & knead in, adding the Flour in tiny amounts till pastry is smooth, soft & pliable.
  13. Flour worktop & place pastry on it. Cover pastry with another piece of cling wrap & using a roller, roll dough out to 3mm thickness.
  14. Use floured bangkit cutter to cut by pressing into pastry.
  15. Place cut-out bangkit on trays lined with baking paper, spacing them slightly apart as they will spread slightly during baking.
  16. Pinch desired designs on the bangkit (optional step).
  17. Mix the remaining rolled out scraps of pastry with another small portion of the sticky pastry, knead them together & if still sticky, then knead in a little more of the fried Sago Flour. Repeat the rolling, cutting & pinching process.

  18. Bake in pre-heated oven at 160ºC for 10mins to set the design.
    Then reduce temperature to 130ºC & continue to bake for a further 20mins or till Bangkit is very light beige in colour.

Share
Tweet
Pin
Share
No comments
I love tiramisu! Love the combination of mascarphone cheese, coffee, and liquer in this dessert, because each of those ingredients are my favorite!


Many years back, I've attempted Tiramisu, where the recipe can be found in the Cheese Category of my blog. The recipe and ingredients were simple and the results was delicious as well. However, the recipe I had was meant to be presented in cup, rather than cake form. Well, presenting in cup is fine, but I love the joy of slicing through a cake and peeping inside the cake to see how it has been beautifully layered.


So for a period, while I was researching for some interesting, I came across this site called Brown Eyed Baker. I love her site, and her recipes are always easy to follow and they never fail. On her site, I found a recipe for Tiramisu, which involved a little more steps and ingredients to it.Well, since I've tried a couple of her recipe, no harm giving the Tiramisu recipe a try and see how that turns out.


I have to say the result was DIVINE! I could finally present my Tiramisu in a cake form. The cheese was just nice and not-too-rich. With whipped cream included in the recipe, it just makes the whole cake light, making one unable to resist taking a few more slices.


In my company, we have a bake-off challenge every few months, and I made Tiramisu for the bake-off entry. I'm very happy to say that most people in the company agreed that my Tiramisu was awesome and voted it as #1! What an achievement! And with that, I even had my first cake order in years!


Tiramisu

Ingredients
2 1/2 cups (590 ml) of strong brewed coffee
1 1/2 tbsp instant espresso powder
6 1/2 tbsp of coffee liquer (I always increase the quantity to give it a stronger taste)
6 egg yolks
135g sugar
1/4 tsp salt
3/4 cup (175 ml) heavy cream
680g mascarphone cheese
400g ladyfingers (1 pack usually comes in a pack of 20 - 24 biscuits)
3 1/2 tbsp cocoa powder


  1. Stir coffee, espresso, and 2½ tablespoons Kahlua in a wide bowl or baking dish until espresso dissolves; set aside.
  2. In bowl of standing mixer fitted with whisk attachment, beat yolks at low speed until just combined. Add sugar and salt and beat at medium-high speed until pale yellow, 1½ to 2 minutes, scraping down bowl with rubber spatula once or twice. Add ⅓ cup of the heavy cream to yolks and beat at medium speed until just combined, 20 to 30 seconds; scrape bowl.
  3. Set the bowl with yolks over a medium saucepan containing 1 inch of gently simmering water; cook, constantly scraping along bottom and sides of bowl with heatproof rubber spatula, until mixture coats back of spoon and registers 160 degrees on instant-read thermometer, 4 to 7 minutes. Remove from heat and stir vigorously to cool slightly, then set aside to cool to room temperature, about 15 minutes.
  4. Whisk in remaining 4 tablespoons Kahlua until combined. Transfer bowl to standing mixer fitted with whisk attachment, add mascarpone, and beat at medium speed until no lumps remain, 30 to 45 seconds. Transfer mixture to large bowl and set aside.
  5. In now-empty mixer bowl, beat the remaining cream at medium speed until frothy, 1 to 1½ minutes. Increase speed to high and continue to beat until the cream holds stiff peaks, 1 to 1½ minutes longer. Using a rubber spatula, fold one-third of the whipped cream into mascarpone mixture to lighten, then gently fold in remaining whipped cream until no white streaks remain. Set mascarpone mixture aside.
  6. Working one at a time, drop half of ladyfingers into coffee mixture, roll, remove and transfer to 13 by 9-inch glass or ceramic baking dish. (Do not submerge ladyfingers in coffee mixture; entire process should take no longer than 2 to 3 seconds for each cookie.) Arrange soaked cookies in single layer in baking dish, breaking or trimming ladyfingers as needed to fit neatly into dish.
  7. Spread half of mascarpone mixture over ladyfingers; use rubber spatula to spread mixture to sides and into corners of dish and smooth surface. Place 2 tablespoons cocoa in fine-mesh strainer and dust cocoa over mascarpone.
  8. Repeat dipping and arrangement of ladyfingers; spread remaining mascarpone mixture over ladyfingers and dust with remaining 1½ tablespoons cocoa. Wipe edges of dish with dry paper towel. Cover with plastic wrap and refrigerate 6 to 24 hours. Cut into pieces and serve chilled. Leftovers can be stored, tightly wrapped, in the refrigerator for up to 3 days.


Share
Tweet
Pin
Share
No comments
I've never liked baking butter cake, that's because I've never found a good recipe that doesn't result in a dry and coarse butter cake. 

But now that I have completed Wilton Course 3, a dense cake is essential for making sure the whole cake doesn't collapse when it's covered and decorated with fondant and gum paste.

So I asked around and Googled. And I manage to get my answer to not just a very delicious and gorgeous butter cake but also one that's moist and soft.


So here's the recipe I got from Wen's Delight. The recipe uses the chiffon method so that the cake is light and soft!

Old School Butter Cake

Ingredients
250g butter
85g caster suger
1 tsp vanilla paste
1/8 tsp salt
1 tbsp milk
4 egg yolks
200g flour
1 tsp baking powder

4 egg whites
85g sugar

  1. Preheat oven at 170 degree celsius. Line a 8" square tin.
  2. Cream butter, sugar, salt and vanilla until light and fluffy.
  3. Add in egg yolks one at a time and beat till creamy. Add in milk and mix well.
  4. Sift in flour and baking powder and mix well. Set it aside
  5. Whisk egg white and sugar till soft peak.
  6. Fold in 1/3 of the egg white mixture into the butter mixture. Once mixed, fold in the remaining egg white mixture.
  7. Pour batter into lined baking pan and bake for 40 - 45 min.

I also attempted a marble cake with the above recipe. Once you have the batter done, take out 100g of the mixture, and add 1/2 tbsp of chocolate paste to the 100g batter.

Pour the butter mixture into the baking pan, then pour the chocolate mixture on top and twirl with a chopstick to create the marble effect.


Share
Tweet
Pin
Share
No comments
My favorite all time drink! One that seldom goes wrong too! So having come across such a recipe for cupcake definitely spikes my interest!

Got the recipe from BrownEyedBaker, and reviews I've received from my colleagues are great!


Mojito Cupcakes   
Ingredients
½ cup buttermilk
½ cup mint leaves, bruised
190g all-purpose flour
1½ teaspoons baking powder
¼ teaspoon salt
115g unsalted butter, at room temperature
200g granulated sugar
2 eggs, at room temperature
Zest and juice of 1½ limes
2 tablespoons white rum
¼ teaspoon vanilla extract

To Brush the Cupcakes
2 tablespoons white rum
2 sprigs fresh mint

Frosting
340g unsalted butter, at room temperature
575g icing sugar
1½ tablespoons lime juice
3 tablespoons white rum

  1. Combine the buttermilk and the ½ cup mint leaves in a small saucepan over medium heat. Warm until just starting to steam (do not simmer), then remove from the heat and cover. Let steep for 15 to 30 minutes. Once finished, strain the milk into a bowl using a fine mesh sieve. The milk may appear curdled or clumpy, but don't worry, it will come back together. Press on any milk solids and mint leaves to extract all the liquid possible. Give the milk a quick stir to smooth it out and set aside.
  2. While the mint is steeping in the milk, preheat the oven to 325 degrees F. Line a standard muffin tin with paper liners.
  3. In a medium bowl, whisk together the flour, baking powder and salt.
  4. In an electric mixer on medium-high speed, beat the butter and sugar together until pale, light, and fluffy (about 5 minutes).
  5. Reduce the mixer speed to medium and add the eggs one at at time, mixing thoroughly after each addition.
  6. Scrape the sides of the bowl and add the lime zest, lime juice, vanilla extract and rum. Mix until combined.
  7. Reduce the mixer speed low. Add the dry ingredients in three batches, alternating with the buttermilk in two batches. Mix only until just incorporated, using a rubber spatula to give it one last mix by hand.
  8. Divide the batter between the muffin cups. Bake for approximately 25 minutes or until just slightly golden and a skewer shows only moist crumbs attached, rotating the pan at the halfway point.
  9. While the cupcakes are baking, combine the rum and mint sprigs in a small saucepan and warm over medium heat until the rum is heated through (do not let it simmer). Remove the pan from the heat, cover, and let steep until ready to use.
  10. Allow cupcakes to cool for 5 to 10 minutes and then remove to a cooling rack. Brush the tops of the cupcakes with the mint-infused rum. Set the cupcakes aside to cool completely before frosting them.
  11. To make the frosting, whip the butter on medium-high speed of an electric mixer using the whisk attachment for 5 minutes. Reduce the speed to medium-low and gradually add the powdered sugar, mixing and scraping the sides of the bowl until all is incorporated. Give it a mix on medium speed for about 30 seconds. Add the lime juice and rum and mix on medium-high speed until incorporated and fluffy. If the frosting appears a bit too soft, add some additional sugar, one spoonful at a time until desired consistency is reached. Frost cupcakes and garnish, if desired, with a lime wedge and sprig of fresh mint.
The recipe called for buttermilk. I started off with buttermilk but mine ended up simmering and I didn't had additional to work it. So I ended up substituting buttermilk with full cream milk and the cupcake still turned out fine!

Share
Tweet
Pin
Share
No comments
I've always been wanting to lay my hands on this book. Okashi Treats: Sweet Treates Made with Love by Keiko Ishida.

I finally got it and love reading the book! It includes recipe for basic recipes, complete with illustrations for some of the steps. And every recipe comes with tips to note. Love it to bits! 

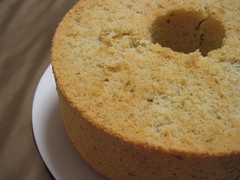
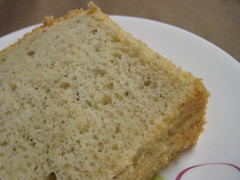
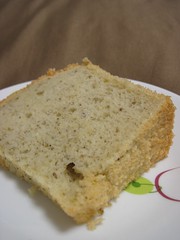
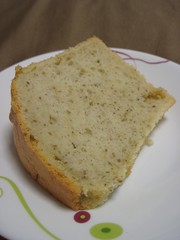
So this weekend, I tried my hands on Black Sesame Chiffon Cake. The recipe is slightly lighter in flavor compared to the usual chiffon cakes I made before. I was a little worried that it wouldn't turn out well, but it is super yummy! Reviews were very good!

I'm already getting ready for the next recipe that I want to try!


Black Sesame Chiffon Cake

Black Sesame Chiffon Cake

Share
Tweet
Pin
Share
No comments
More experiments on Chai  Tea. This time its Chai Tea Chiffon Cake with Chai Whipped Cream.

I adapted the Chai Cream recipe from this site. But instead of preparing all the spices, I infused the cream with the tea leaves from T2. The steps are exactly the same, and the cream is prepared one day before so that it's cold enough to be whipped.

Chai Tea Chiffon Cake

Ingredients
(A)
225g all-purpose flour
1 tsp baking powder
1 tsp salt
65g sugar

(B)
1/2 cup vegetable oil
6 egg yolks
3/4 cup water
1 tbsp Chai Tea leaves

(C)
6 egg whites
1/2 tsp cream of tartar
95g sugar

  1. Preheat over to 175 degree celsius.
  2. Combine (A) in a bowl. Stir well to blend.
  3. Combine (B) and stir till well blended.
  4. Make a well in (A), add (B) to the flour mixture. Beat with mixer until smooth.
  5. Beat egg whites till foamy. Add in 1/3 of the sugar and cream of tartar, beat for a few minutes.
  6. Add in remaining 2/3 sugar and cream of tartar, continue beating with stiff and glossy peak.
  7. Gently fold in 1/3 of egg white mixture to egg yolk mixture.
  8. The mix and fold in the egg yolk mixture to the rest of the egg white mixture till well combine.
  9. Pour mixture into cupcake liners.
  10. Bake for 10 - 15 min.
  11. Whip Chai Tea cream till peak. Decorate cupcake with cream once the cake is cool.

Chai Tea Chiffon Cupcake


Share
Tweet
Pin
Share
No comments
I remember the Chai Cake that I had from The Patissier years ago. With more exposure to Chai Tea Latte recently, I start appreciating the unique taste to Chai even more, and this brought back memory of the cake I had many years ago. It's amazing how flavors can help to bring back wonderful memories, 'cause I still vaguely remember where and under what environment I had the cake.

So while I was shopping for Tea Leaves at T2 in Sydney recently, and came across Chai Tea leaves, I just felt it's something that I should try my hands on.

So I googled for Chai Tea cake and came across this interesting recipe.

Chai Tea Cake with Salted Pistachio

Chai Tea Cake with Salted Pistachio

Share
Tweet
Pin
Share
No comments
This meal was whipped up from the leftover herbs I had in my fridge. Rosemary, Thyme and Parsley found in my fridge. All not cheap! So I had to make sure that they were fully utilized and not thrown out!

I didn't had any recipe to follow for the pasta. I just randomly put it together with my leftover ingredients, including an interesting tip I picked up from Masterchef.

Fusilli with Prawn in Pomodoro Sauce

Ingredients
2 extra large prawns
1 bulb of shallot, peeled and sliced
30g Italian Parsley, finely chopped
15g Thyme
150g Fusilli Pasta
200g Pomodoro Sauce or Tomato Pasta sauce

  1. Remove shell from prawns and devein it. 
  2. Do not throw out the shells. Prepare a small pot of oil, stir-fry shell in oil so that the oil absorbs the flavor from the prawn shell.
  3. Boil pasta in a pot of boiling water with salt. Cook till al dente.
  4. Heat up pan, with the prawn oil, fry the shallots till fragrant.
  5. Add in prawns and fry them for a couple of minutes.
  6. Add in tomato sauce and fry for a few minutes. 
  7. Next, add in pasta, chopped parsley and thyme. Stir to coat all ingredients evenly.
Pan-fried Honey and Rosemary Chicken

Ingredients
2 chicken thigh
2 sprigs of fresh Rosemary
Olive Oil
2 - 3 teaspoons of Honey
Salt and Ground Black Pepper

    1. Heat up oil. Place chicken thigh in the pan.
    2. Drizzle honey over chicken. Add salt, ground black pepper and rosemary over the chicken. 
    3. Flip chicken every 5 minutes and baste chicken with honey and oil.
    4. Serve when chicken is brown on both sides and cooked in the centre.

Fusilli with Prawn and Grilled Honey and Rosemary Chicken

Fusilli with Prawn and Grilled Honey and Rosemary Chicken


Share
Tweet
Pin
Share
No comments
I had really tasty Aglio Olio at Nassim Hill Bistro recently, so I decided I want to make my own since the husband is always too lazy to drive out for meals!

Recipe was from NoobCook.com, for a noobie like me of course. I omitted chilli since I wasn't a chilli person. Love it! It was simple and tasty for me but the husband complained of not enough meat and ended up adding 2 sunny-sides up and sausages. 
-_-"""

Man are hard to please.

Garlic Aglio Olio 
 
Share
Tweet
Pin
Share
No comments
So we were out doing grocery shopping with the little one one day, the husband saw Extra Large Prawns at the Fish section and suddenly craved for Garlic Prawns. But I preferred lamb chops, so we ended up having both for dinner. How to diet in such cases???

I don't know where the husband got his recipe so I'm just putting this together based on memory of what I saw.

Butter Garlic Prawns

Ingredients
4 extra large Tiger Prawns, deviened but keep the shell on
4-5 bulbs of garlic, finely chopped
50g butter
Salt

  1. Heat pan up. Melt half of the butter in pan. Add in half of the chopped garlic and stir-fry till its fragrant. Make sure its not too browned else it will turn bitter. Dish it out and leave it aside.
  2. Turn each prawn on its back and, with the point of a sharp knife, make a deep cut down the centre of each prawn, but do not cut through.
  3. Stuff the butter garlic into the centre of the prawn and it let sit and marinate for about an hour.
  4. Once it's marinated, heat up the pan again, add the remaining butter. Once the butter has melted, add in the remaining garlic. 
  5. Add in the marinated prawns and fry till the prawns and cooked.
  6. Serve.

Lamb chops are the easiest for me to make, I just grab off-the-shelf seasoning and pan-fry it. The only technique is to know when not to overcook the lamb.

Lamb Chops
4 pieces of lamb chops
Masterfood Roast Lamb Seasoning

  1. Season the lamb chops with the roast lamb seasoning. I usually coat the entire lamb chop with the seasoning as its not very salty.
  2. Marinate lamb chops for about an hour.
  3. Pan-fry lamb chops till your preferred done-ness.

How to test the done-ness of your meat? I read many websites teaching it using meat temperature, but I don't have the thermometer to test the temperature of my meat. I picked up this tip from a variety show in the past, it's very useful and it works for me every time!

Finger Test to Check Doneness of Meat


Grilled Lamb Chop with Grilled Garlic Prawns 

 
Share
Tweet
Pin
Share
No comments
I remember vividly the aromatic and the fragrance of the onion bread that I had 4 years ago at Morton's steakhouse. I've never returned after that, I wonder if they still tastes as fragrant and soft!

So because I have craving for it, I searched and found this recipe! It smells great and goes very well with butter! Yum! The only problem I had was my bread was a little tough. I need to make my machine work the kneading!!! Or time to upgrade my machine!

Well proofed dough!
Caramelized Onion Bread

All yummy and ready to eat!
Caramelized Onion Bread

Caramelized Onion Bread
Share
Tweet
Pin
Share
No comments
The husband and I have been very inspired by Masterchef lately and we have been whipping up meals during the weekends when we can find the time. Here's one of our latest creation where the husband was craving for Honey-Baked Chicken. So I got the recipe off Allrecipe.com and modified a little.

Instead of whole chicken, I used chicken thigh. And I replaced Garlic Powder with Chopped Garlic.

And on the sides, I included Mushrooms lightly sauteed with salt and pepper. As well as Wild Rocket Salad with Japanese Sesame Sauce.

Verdict? The chicken was not good enough to satisfy the husband's palette. I didn't find it very good either. The chicken didn't really had the honey taste to it even though we baked it for 45 - 60 mins. I enjoyed my mushroom and salad more.

Baked Honey Chicken

Baked Honey Chicken
Share
Tweet
Pin
Share
No comments
Finally alive after 2 years? Haha! I have been baking once a while for the 2 years, just that they're missing from my blog. So what goes up first after 2 years?

Lychee Cupcake! I had craving of Lychee Martini for days.. But I did a non-alcohol version so that everyone can have a taste of it. Definitely will try Lychee Martini cake the next time!

Lychee Cupcake

The cupcake was Buttermilk Cupcake (and replaced Vanilla essence with Lychee essense), with Lychee Fresh Cream to top it off.

Lychee Fresh Cream

Ingredients
500 ml whipping cream
50 - 100g Icing Sugar
1 tsp Lychee Essence


  1. Pour whipping cream and icing into mixing bowl. Whip cream and sugar till cream peaks and stiff enough to be piped.
  2. Add Lychee Essence and give it a quick stir.
  3. Pipe Lychee cream onto cooled cupcakes and decorate with cut lychees

Share
Tweet
Pin
Share
No comments
Very inspired by Hairloom and Caramel cafe to try my hands out on this! Armed with my Buttermilk Cupcake recipe and managed to find a good recipe for Caramel Buttercream. Caramel was made from scratch with a tinee bit modification to the recipe itself. Whooot! The Caramel is to die for la! =P

Buttermilk Cupcake with Salted Caramel Buttercream Buttermilk Cupcake with Salted Caramel Buttercream

Buttermilk Cupcake with Salted Caramel Buttercream

Salted Caramel Buttercream (adapted from "Gimme Some Oven")

Ingredients (makes frosting for 12 cupcakes)
50g caster sugar
2 Tbsp. water
100ml heavy cream (or whipping cream)
1 tsp. vanilla (I used 1 Vanilla pod)
85g butter, softened
85g shortening
250g icing sugar
pinch of salt

  1. Mix together caster sugar and water in a small saucepan and bring to a boil over medium-high heat.
  2. Continue cooking, without stirring, until mixture turns dark amber in color, about 6 to 7 minutes.
  3. Remove from heat and slowly add in cream and vanilla, stirring with a wooden spoon until completely smooth.
  4. Set aside until cool to the touch, about 25 minutes.
  5. Beat the butter, shortening and salt in the bowl of a stand mixer fitted with the paddle attachment on medium-high speed until light in color and fluffy, about 3 minutes.
  6. Reduce speed to low, add powdered sugar, and mix until completely incorporated.
  7. Turn off the mixer, and then add caramel. Beat frosting on low to combine, and then increase to medium-high and beat until airy and thoroughly mixed, about 2 minutes.
  8. Refrigerate if not using immediately (or to harden the frosting a bit).

Share
Tweet
Pin
Share
No comments
I was searching around for a simple Cream of Mushroom Soup 'cause Mom was making Western Meal for Sunday dinner. And I'm tired of the soups that we always drink from Campbell cans. I love the kind where we always get to eat at Soup Spoon and Souplicious. YUMZ!

So I came across a few sites that had quite good recipes, including Jamie Oliver's site. Uh oh, I think I'm becoming a fan of him soon, I have the urge to buy his books! But his recipe asked for Porcini which I have no idea where to get in a short notice. So I managed to get the recipe from Evan's Kitchen Ramblings and modified the recipe a little. The recipe is to keep! It tastes great though CL said something was missing from the soup still. Hmmmm...

Chunky Cream of Mushroom Soup Chunky Cream of Mushroom Soup

Chunky Cream of Mushroom Soup

Ingredients
30g butter
1 brown onion, finely chopped
2 leaves of Bay Leaves
650g white button mushrooms, chopped
4 cups milk
1/3 cup single or pouring cream
Salt, black pepper
chopped Walnuts and Parsley to garnish

  1. Heat a large saucepan over high heat. Add butter, onions, bay leaves and mushrooms.
  2. Moisture from the mushroom will start escaping. Cook till most of the moisture disappears.
  3. Add milk and bring to a boil. Add cream, sea salt & black pepper.
  4. Remove soup from the pan and blend soup until desired smoothness is achieved.
  5. Ladle into soup bowls and top with chopped walnuts and parsley before serving.

Share
Tweet
Pin
Share
2 comments
I was searching around for Mushroom Soup recipe when I chance upon Jamie Oliver's recipe on Chocolate Brownie. A very easy to follow recipe with no complex equipment and ingredients required, and it tastes awesome! Here's the link to his recipe!

Chocolate Walnut Brownie Chocolate Walnut Brownie

Chocolate Walnut Brownie

Ingredients
250g unsalted butter
200g dark Fairtrade chocolate (70% cocoa solids), broken up
50g chopped walnuts
80g cocoa powder, sifted
65g plain flour, sifted
1 teaspoon baking powder
360g caster sugar
4 large free-range or organic eggs
optional: zest of 1 orange
optional: 250ml crème fraîche

  1. Preheat your oven to 180°C/350°F/gas 4.
  2. Line a 25cm square baking tin with greaseproof paper.
  3. In a large bowl over some simmering water, melt the butter and the chocolate and mix until smooth. Add the chopped nuts and stir together.
  4. In a separate bowl, mix together the cocoa powder, flour, baking powder and sugar, then add this to the chocolate, and nut mixture. Stir together well.
  5. Beat the eggs and mix in until you have a silky consistency.
  6. Pour your brownie mix into the baking tray, and place in the oven for around 25 minutes.
  7. You don’t want to overcook them so, unlike cakes, you don’t want a skewer to come out all clean. The brownies should be slightly springy on the outside but still gooey in the middle.
  8. Allow to cool in the tray, then carefully transfer to a large chopping board and cut into chunky squares. These make a fantastic dessert served with a dollop of crème fraîche mixed with some orange zest.

Share
Tweet
Pin
Share
No comments
A slightly more presentable chiffon cake this week! I just realized that I had my oven on grill when I baked my Earl Grey tea last week. No wonder the top was burnt lo!

Now that all the settings were right, I had a more spongey chiffon cake with a tinch of Lavender taste! Thanks to Aeriel for sharing her Lavender flowers with me!

Lavender Chiffon Cake Lavender Chiffon Cake

Lavender Chiffon Cake Lavender Chiffon Cake

Lavendar Chiffon Cake
Ingredients
(A)
225g all-purpose flour, sifted
1 tbsp baking powder
1 tsp salt
65g sugar

(B)
1/2 cup vegetable or canola oil
6 egg yolks
3/4 cup water
1 tbsp Lavender flower - blended coarsely

(C)
6 egg whites
1/2 tsp cream of tartar
95g sugar
  1. Preheat oven to 175 degree celsius.
  2. Combine (A) in a bowl. Stir well to blend.
  3. Add (B). Beat with an electric mixer until smooth.
  4. Beat (C) until moist peaks formed. Gradually add 3/4 cup sugar, beating until stiff and shiny peaks are formed.
  5. Fold 1/3 of the egg whites into the egg yolks mixture, fold to mix and then add the rest of the egg whites. Fold gently but thoroughly.
  6. Pour batter into ungreased 10" tube pan.
  7. Bake for 60 mins or till a toothpick inserted in the center comes out clean.
  8. Invert cake and cool completely in pan. When cool, loosen the edges and shake pan to remove cake.
Share
Tweet
Pin
Share
No comments
Earl Grey Chiffon Cake Earl Grey Chiffon Cake

Earl Grey Chiffon Cake
Ingredients

(A)
225g all-purpose flour, sifted
1 tbsp baking powder
1 tsp salt
65g sugar

(B)
1/2 cup vegetable or canola oil
6 egg yolks
3/4 cup water
1 tbsp Earl Grey Tea leaves

(C)
6 egg whites
1/2 tsp cream of tartar
95g sugar

  1. Preheat oven to 175 degree celsius.
  2. Combine (A) in a bowl. Stir well to blend.
  3. Add (B). Beat with an electric mixer until smooth.
  4. Beat (C) until moist peaks formed. Gradually add 3/4 cup sugar, beating until stiff and shiny peaks are formed.
  5. Fold 1/3 of the egg whites into the egg yolks mixture, fold to mix and then add the rest of the egg whites. Fold gently but thoroughly.
  6. Pour batter into ungreased 10" tube pan.
  7. Bake for 60 mins or til a toothpick inserted in the center comes out clean.
  8. Invert cake and cool completely in pan. When cool, loosen the edges and shake pan to remove cake.
Share
Tweet
Pin
Share
No comments
Newer Posts
Older Posts

About me

About MeBaking is something I've been learning since my secondary schools, and now I still love learning new techniques and experimenting recipes. The greatest satisfaction is when everyone enjoys my bakes and wipes them all out!

Follow Us

  • Facebook
  • Instagram
  • Pinterest

Labels

  • aglio olio
  • almond flakes
  • baileys
  • baked
  • bakes
  • baking
  • banana
  • bangkit
  • birthday cake
  • biscuits
  • black forest
  • black sesame
  • blueberry
  • bread
  • browneyedbaker
  • brownie
  • bun
  • butter
  • butter cake
  • buttercream
  • buttermilk
  • cake
  • cake recipe
  • cakes
  • canned fish
  • caramel
  • caramel buttercream
  • caramelized onions
  • carrot
  • chai tea
  • cheese
  • cheesecakes
  • cherries
  • cherry
  • Chicken
  • chiffon
  • chinese
  • chinese new year
  • chip
  • chocolate
  • chocolate chips
  • chunky mushroom
  • cny
  • coffee
  • coffee cream
  • cookies
  • cranberries
  • cranberry
  • cream
  • cream cheese
  • cream of mushroom
  • cupcake
  • cupcakes
  • dark cherry
  • dough
  • durian
  • durian cake
  • durian puree
  • earl grey
  • egg whites
  • fish
  • flakes
  • flower
  • fresh cream
  • hazelnut
  • honey
  • irish baileys
  • jam
  • kueh
  • kueh bangkit
  • kuih
  • lapis
  • lavendar
  • layered cake
  • lemon
  • lemon meringue
  • liquor
  • lychee
  • mango
  • marble
  • marble cake
  • marmalade
  • mascarphone
  • meringue
  • mint
  • mocha
  • mojito
  • mousse
  • mousse cake
  • muffin
  • muffins
  • mushroom
  • natural yogurt
  • non-dairy cream
  • nutella
  • old school
  • onion bread
  • orange
  • orange juice
  • orange rind
  • pandan
  • pasta
  • pastries
  • pies
  • pineapple
  • pineapple tarts
  • pistachio
  • pitted cherry
  • prawn
  • raisins
  • recipe
  • rolls
  • rum
  • sago flour
  • salted caramel
  • salted egg yolk
  • sardine
  • shortcake
  • soup
  • sponge cake
  • strawberry
  • struesel
  • sweet bread
  • sweet bun
  • sweet dough
  • swiss roll
  • tarts
  • tea cake
  • tiramisu
  • traditional
  • tuna
  • vanilla
  • walnuts
  • walnuts. carrot cake
  • whipped cream
  • yogurt
  • zblog

recent posts

Sponsor

Facebook

Blog Archive

  • ▼  2017 (3)
    • ▼  January (3)
      • Salted Egg Yolk Cookies
      • Pineapple Tarts (Enclosed)
      • Kueh Bangkit
  • ►  2014 (3)
    • ►  October (2)
    • ►  July (1)
  • ►  2013 (9)
    • ►  October (5)
    • ►  September (1)
    • ►  August (3)
  • ►  2010 (10)
    • ►  October (1)
    • ►  May (2)
    • ►  March (2)
    • ►  February (1)
    • ►  January (4)
  • ►  2009 (14)
    • ►  July (2)
    • ►  June (1)
    • ►  April (2)
    • ►  March (7)
    • ►  February (1)
    • ►  January (1)
  • ►  2008 (7)
    • ►  November (2)
    • ►  October (1)
    • ►  August (2)
    • ►  July (1)
    • ►  January (1)
  • ►  2007 (14)
    • ►  October (4)
    • ►  August (5)
    • ►  July (3)
    • ►  June (1)
    • ►  April (1)
Facebook Instagram Pinterest
FOLLOW ME @INSTAGRAM

Created with by ThemeXpose | Distributed By Gooyaabi Templates